
Hello and welcome. In this blog, we will talk about how FortiOS can block and log traffic sent over AI chatbots. Here’s a gap I ran into recently: ChatGPT and Gemini chats run over plain HTTPS, so FortiGate’s DLP scanning already catches them without me touching a single setting. Copilot doesn’t play by the same rules — it talks to its backend over WebSocket, and until FortiOS 8.0, that traffic was basically invisible to UTM inspection. No matter how tight my DLP profile was, Copilot just walked right past it.
FortiOS 8.0 fixes that with proper FortiOS WebSocket DLP support, so I decided to actually build it out and test it against a real Copilot session instead of just reading the release notes. This post is that walkthrough — GUI first with screenshots from my own setup, then the full CLI at the end if you’d rather skip straight to config syntax.
Why FortiOS WebSocket DLP Inspection Matters for AI Chatbots
FortiOS 8.0 extends UTM inspection — DLP, AV, IPS, and file filter — to WebSocket traffic for the first time (Fortinet’s own release notes on Enhanced UTM protection with WebSocket traffic inspection cover the underlying feature if you want the vendor-side detail). Before this release, any app riding WebSocket as its transport was a blind spot, full stop — didn’t matter how well everything else was locked down. I picked Copilot to test this because it’s real production traffic I actually use, not a synthetic lab example, and it gives me a clean way to prove the block genuinely happened rather than just trusting a config diff.
Step 1 — Create a DLP Dictionary for the Keyword
First stop is Security Profiles > Data Loss Prevention, then the Dictionary tab. I created a new dictionary and named it fortinet — nothing fancy, I wanted a name I’d instantly recognize later. Inside it, I clicked Create new under Dictionary Entries, set the data type to g-keyword, and typed fortinet as the pattern. This single entry is what the sensor downstream actually matches against.
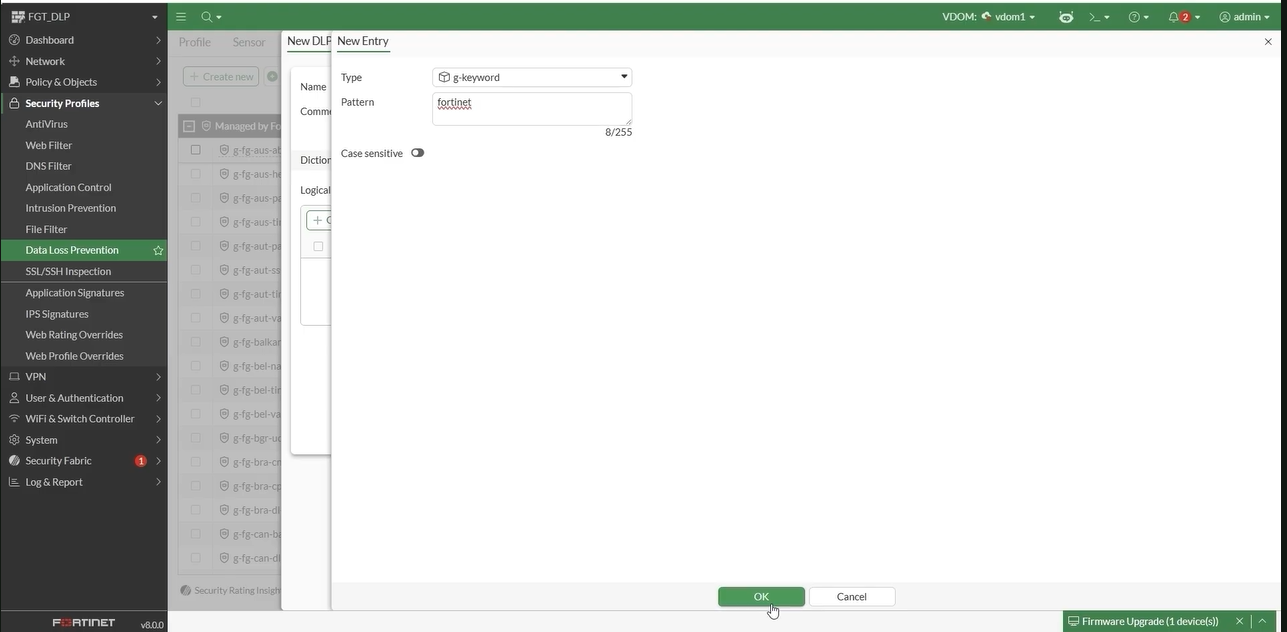
Once I saved it, the entry showed up under Managed Locally, sitting right alongside all of FortiGuard’s own pre-built dictionaries.
Step 2 — Build a DLP Sensor
Next I switched to the Sensor tab and created a new one. I set the match criteria to any entries, hit Add, and pulled the fortinet dictionary in from Managed Locally. That gave me a sensor — I called mine keyword_detect — that points straight at the dictionary I just built.
Step 3 — Create the DLP Profile
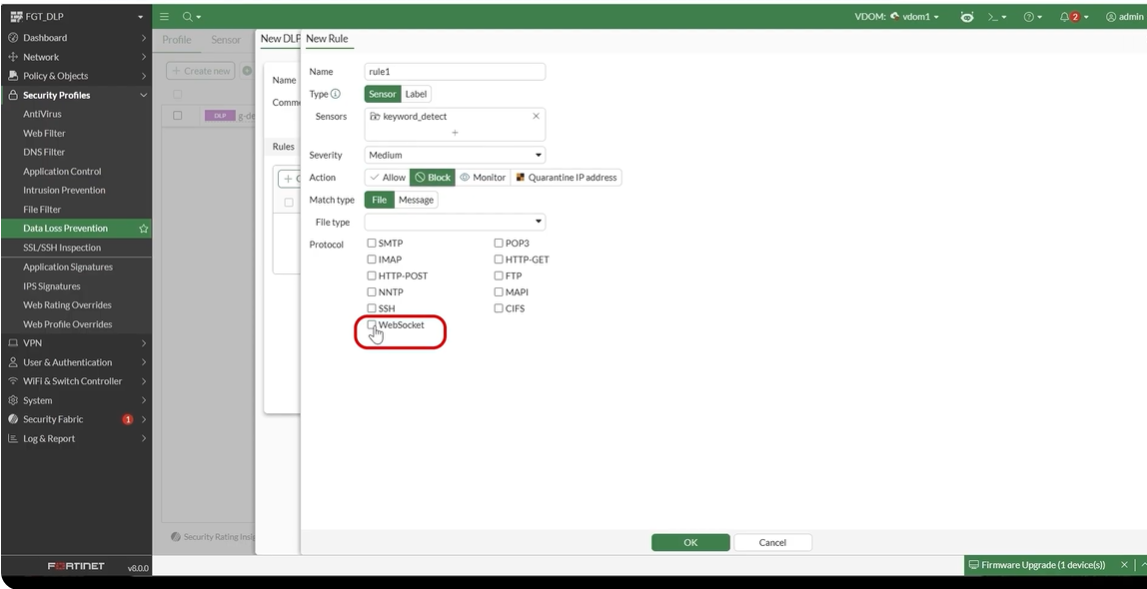
Over on the Profile tab, I created a new DLP profile and added a rule under it. Type is set to Sensor, pointing at keyword_detect, action set to Block. The part that actually matters for this whole exercise: since I’m testing against Copilot specifically, I checked the WebSocket protocol box instead of the usual SMTP/HTTP/FTP checkboxes. That’s the one setting that ties this rule to WebSocket traffic at all — easy to miss if you’re used to building DLP rules the old way.
Step 4 — Enable WebSocket in Protocol Options (CLI)
This step doesn’t exist in the GUI, at least not that I found — I had to drop into the CLI, open the protocol options profile, and explicitly flip WebSocket on. Without this, the firewall policy won’t actually inspect that protocol no matter what the DLP profile says:
config vdom
edit vdom1
config firewall profile-protocol-options
edit protocol
config websocket
set status enable
end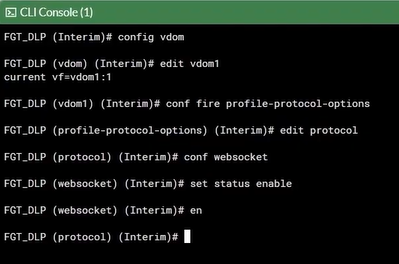
Step 5 — Apply the DLP Profile to the Firewall Policy
Back in Policy & Objects > Firewall Policy, I edited the policy that actually carries this traffic and turned on the DLP profile, along with the protocol options profile from the step above, under Security Profiles. Saved it, and the policy now shows AV, DLP, and Protocol Options all attached in one place.
Testing It Against a Real Copilot Prompt
Time to see if any of this actually works. On a Windows client sitting behind this policy, I opened a browser, went to Microsoft Copilot, and typed a prompt that included the word fortinet. If everything above is wired correctly, that message never makes it to Copilot at all — it gets caught and blocked mid-transit.
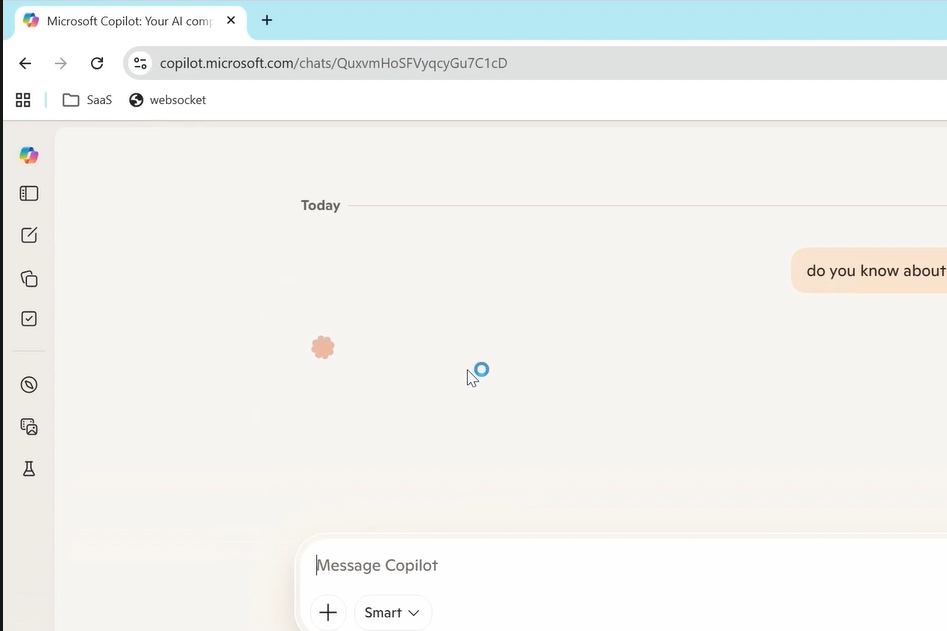
And that’s exactly what happened — the message just never sent.
Verifying the Block in FortiGate Logs
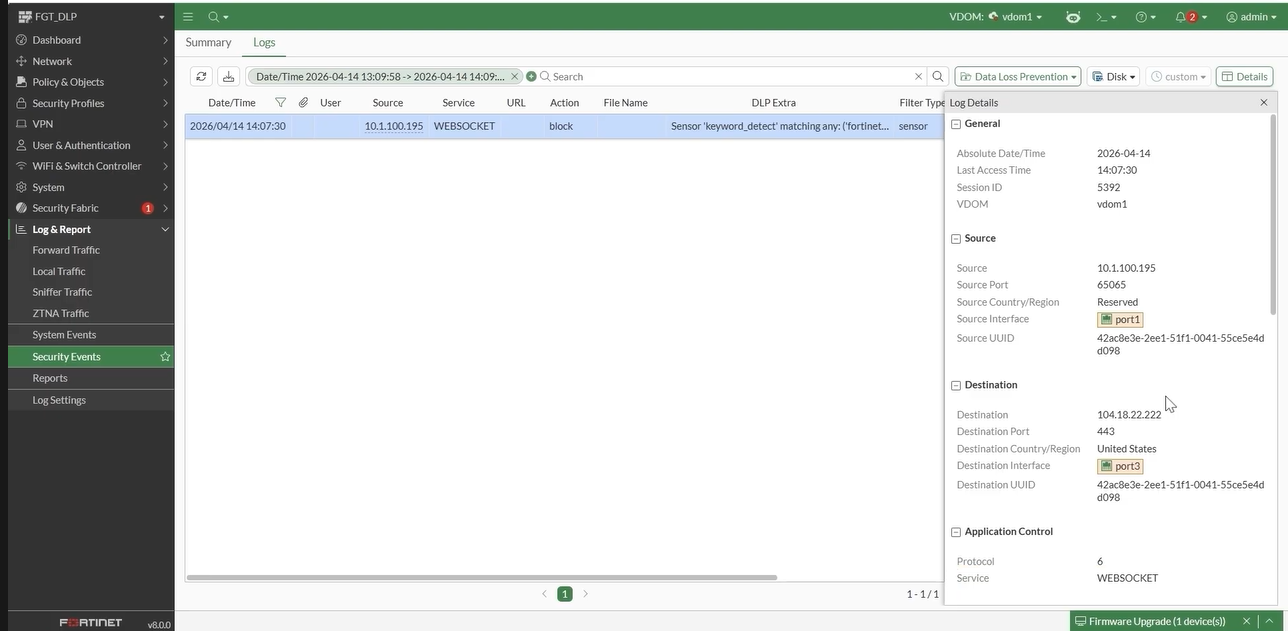
Back on the FortiGate GUI, I found the block under Log & Report > Security Events, filtered to Data Loss Prevention. Opening the log details spelled out exactly what happened: the keyword_detect sensor matched my fortinet entry, action was block, and — this is the detail I actually cared about proving — Application Control shows the service as WEBSOCKET, not HTTPS. That’s the confirmation that WebSocket inspection specifically did the work here, not some other profile catching it by coincidence.
Full CLI Walkthrough
If you’d rather build this straight from the CLI instead of clicking through the GUI, here’s the same five steps end to end.
1. DLP Dictionary (the “fortinet” keyword)
config dlp dictionary
    edit "Fortinet"
        config entries
            edit 1
                set type keyword
                set pattern "fortinet"
                set status enable
            next
        end
    next
end
2. DLP Sensor (references the dictionary, match criteria = any)
config dlp sensor
    edit "Copilot-Sensor"
        set match-type match-any
        config entries
            edit "Fortinet"
                set status enable
            next
        end
    next
end
3. DLP Profile (rule → sensor, action block, protocol = websocket)
config dlp profile
    edit "Copilot-DLP-Profile"
        config rule
            edit 1
                set name "Block-Fortinet-Keyword"
                set severity medium
                set type sensor
                set sensor "Copilot-Sensor"
                set proto websocket
                set action block
                set log-packet enable
            next
        end
    next
end
4. Enable WebSocket in the Protocol Options profile
config firewall profile-protocol-options
    edit "Copilot-Protocol-Options"
        set websocket enable
    next
end
5. Apply both profiles to the firewall policy
config firewall policy
    edit <policy-id>
        set utm-status enable
        set profile-protocol-options "Copilot-Protocol-Options"
        set dlp-profile-status enable
        set dlp-profile "Copilot-DLP-Profile"
    next
end
Verification / Live Testing
If you want to watch the block happen live instead of just checking the log afterward, this tails the DLP daemon while you send the Copilot prompt yourself:
diagnose debug application dlpd -1
diagnose debug enable
And this one just confirms DLP UTM events are actually landing in disk logs — without it, Security Events > Data Loss Prevention in the GUI stays empty even if the block is working:
config log disk filter
    set dlp enable
end
FAQ
Does this affect ChatGPT and Gemini too?
Not through this specific path, no. Both still run over plain HTTPS, which standard DLP scanning already handles without touching protocol options at all. This WebSocket profile only closes the gap Copilot’s transport left open. If you want the broader picture — blocking or monitoring AI chatbots at the web-filter level instead of DLP — I covered that separately in Block AI Apps on FortiGate: Monitor & Block ChatGPT, Claude via Web Filter.
Will this break normal WebSocket apps that have nothing to do with AI chatbots?
It can, if you’re not careful — enabling WebSocket inspection applies to everything riding WebSocket through that firewall policy, not just Copilot. Chat widgets, real-time dashboards, some collaboration tools all get pulled into DLP scanning too. I’d scope this to a dedicated policy rather than bolting it onto a broad existing one.
Why block on a single keyword instead of a real data-classification dictionary?
Purely to keep this walkthrough easy to trigger and verify — one keyword, one clean test. In an actual production setup, I’d swap the dictionary entries for FortiGuard’s managed sensors (PII, source code, regulatory identifiers) or a custom regex/keyword set matched to whatever actually shouldn’t be leaving the building through a third-party chatbot.
🔧 Free Network Tools
Handy while you're troubleshooting — no signup needed.